20/10/2020

Total-Body Mobility Circuit

 Tabata is not just for high-intensity interval training — this routine uses it to mobilize and elongate.

Regular mobility practice ensures that your body is functioning at its best, and though we understand this as athletes, it’s not always easy to find the time, the space or the right exercises to construct a meaningful session.

This full-body mobility circuit is the perfect solution: It’s simple to follow and it’s effective, hitting all the major muscle groups with both static stretching and banded distraction — a technique in which you use the pull of a resistance band to create space within a joint, helping the bones track more smoothly. What’s more, this routine uses a Tabata-style interval structure to keep things moving, increasing the effectiveness of each stretch in less time. It also enables you to focus more intently on your stretch, increasing your mind-body connection.

Perform a 20-second stretch and a 10-second rest for each move. During the stretch interval, your goal is to keep the intensity of the stretch high; during the rest interval, release the stretch a bit to rest, but don’t go completely slack. Start by doing two rounds of each move on both sides, and build from there. Do this routine postworkout or on an active recovery day for best results.

Banded Ankle StretchBanded Ankle Stretch

Secure a resistance band around a rack or rig at calf height and step your left foot inside the loop. Position the band on top of your ankle joint, turn your back to the rack/rig and then step forward with your left foot to create resistance. Bend your left knee while keeping your left heel flat on the floor and hold there for 20 seconds. During the rest interval, extend your left knee slightly to soften the stretch for 10 seconds.

Lizard LungeLizard Lunge

Start at the top of a push-up with your hands underneath your shoulders. Step your left foot forward and to the outside of your left hand with your knee close to your shoulder. Keep your right leg straight and strong as you drop your left elbow toward the floor and hold for 20 seconds. During the rest interval, place both palms to the floor for 10 seconds.

Half-SquatHalf-Squat

Stand with your feet outside shoulder-width apart, toes forward. Keep your left foot flat as you bend your left knee and drop your hips, keeping your chest lifted and your right leg straight, foot flexed, going as low as you can. Hold for 20 seconds, then straighten both legs and come into a wide-legged forward fold for 10 seconds.

Banded Pigeon PoseBanded Pigeon Pose

Anchor a resistance band around a pole or rack at shin height, then step your left leg into the loop and slide it up your thigh until it’s near your groin. Stand so the pole/rack is at about 4 o’clock behind you, then drop down to your hands and knees. From there, bring your left knee to the floor so your shin is as straight as you can get it in front of you and extend your right leg behind you. Scoot away from the pole to create tension with the band, square your hips and hold for 20 seconds. During the rest interval, roll onto your outer left hip for 10 seconds.

Banded Lat StretchBanded Lat Stretch

Secure a band loop around a high pull-up bar and slide your right hand through the other end. Step away from the anchor to create tension, then drop your right knee to the floor and extend your arm, palm down. Sit your hips back, allowing the band to stretch the right side of your body for 20 seconds. Rise up for a 10-second break.

Reverse TabletopReverse Tabletop

Sit with your feet flat on the floor, knees bent, and place your hands behind you, fingers forward. Press your hips up until they align with your shoulders and knees. Rock your weight slightly forward over your heels and hold for 20 seconds. Lower your hips to the floor for the rest interval.

15/10/2020

Jess’ Top Four Tips for Glowing Skin


Hi angels,

I know how much glowing, healthy, flawless skin can boost your confidence – so today I’m sharing my top four tips on how to improve your skin health and appearance!

1. Drink plenty of water.

Water plays a really important role in digestion, absorption of nutrients, and removing toxins from your body. Drinking more water flushes these toxins out, and boosts the moisture of your skin – so you can get the glowy skin you’ve always wanted!

If you’ve ever felt like your skin is dry or flakey, this is often the sign you’re not drinking enough water. Aim for at least 2L per day, to help get the radiant glow you’re looking for!

2. Eat more healthy fats.

Omega-3 fatty acids are SO important for skin health. Found in foods like avocado, nuts and seeds, oily fish and olive oil, these fats provide hydration and elasticity to your skin.

They also help reduce inflammation in the body, which is so helpful if you suffer from dermatitis, eczema or psoriasis. This is because omega-3s can improve your skin barrier function, to keep moisture in and irritants out!

Try some of the recipes in the JSHealth App like my One Pan Japanese Salmon for some delicious, nutritious meals packed with healthy fats and omega-3s!

3. Get enough sleep!

When we sleep, our skin repairs itself from damage, inflammation and harmful chemicals it’s been exposed to throughout the day. Sleep also enhances collagen production, to prevent fine lines and signs of ageing.

If you’re not getting enough sleep, your skin can’t properly repair itself, heal wounds, or produce collagen – which can cause breakouts, increased fine lines, and skin damage.

Aim for 7-9 hours per night to keep your skin healthy and give it time to repair itself!

4. My Vitality X + Collagen

My newest vitamin formula, Vitality X + Collagen, has made the world of difference to my skin. It contains 10 science-backed ingredients proven to support skin health and appearance, as well as hair and hair and nails, digestive health, energy levels, and vitality! 

Among the 10 ingredients is Astaxanthin, which maintains and supports the firmness, integrity, structure, and health of your skin, as well as Vitamin C and Silica to naturally boost collagen production, and improve skin strength and elasticity.

Vitality X + Collagen also contains the purest source of high-quality, hydrolysed marine collagen, shown to support skin hydration and elasticity in females, and assist with reducing skin wrinkles and fine lines.

It’s anti-ageing, nourishing for your skin, and will ensure your skin is glowing and healthy in no time.

I truly can’t recommend it enough angels.

I hope these tips help you nourish your skin!

Feedspot Today

11/10/2020

Health Articles For Your Happiness

Iron is a key nutrient for energy during exercise and it's good for women . Recent studies from the American College of Sports Medicine found that many active women suffer from iron deficiency , the risk of causing pain or injury to the muscles and fatigue after exercise . so that’s why you must consume iron sources food. Beside that. Here’s why?

Tired muscles certainly can not be forced to move further away . United State Department of Agriculture ( USDA ) recommends that women consume 18 milligrams of iron from iron sources per day .

To meet the needs of women need iron sources from iron-rich food. Here are some types of iron sources that can be consumed by a woman to meet the needs of the iron ,

1 . Nuts .

One cup of beans contains about 6.59 milligrams of iron . this iron sources is one of the most delicious iron sources for women, I think. In addition to iron , beans are also rich in fiber and vitamin A. The beans can be used as a snack or appetizer .it contains a great amount of nutrients beside iron sources.

2 . Spinach .

One cup or the equivalent of 100 grams of spinach contains 6.43 milligrams of iron . Do you remember popeye? he’s strong. and the women fall in love with him. Because he ate one of the most precious iron sources. Spinach is rich in vitamin A , calcium , and potassium for muscle strengthening . great amount of nutritients in addition of iron sources.

3 . White rice .

One cup or the equivalent of 100 grams of white rice contains 7.97 milligrams of iron . It’s one of the most valueable iron sources. Because it nest a great amount of iron from this iron sources. If you(women) like cooking, you can make fried rice from this.

4 . Beef .

Three ounces of beef or the equivalent of 85 grams contains 5.24 milligrams of iron . In addition to iron , beef is also rich in protein that helps the women body's recovery after exercise . one of the most yummy iron sources beside Nuts.

5 . Red beans .

One cup or the equivalent of 100 grams of red beans contains 5.2 milligrams of iron . Kidney beans are also rich in fiber intake , vitamin C , and protein .You(women) can make an ice cream if you want from this iron sources.

6 . Oysters .

Three ounces of oysters or the equivalent of 85 grams contains 5.91 milligrams of iron . This iron sources are also rich in calcium which is good for women health and of course you don’t want to miss the iron from this iron sources.right?

7 . Tomato .

One cup of tomatoes or the equivalent of 100 grams contains 3.39 milligrams of iron . Consumption of this iron sources also prevent skin aging with antioxidants, good for women again. .This iron sources is good for your skin beside beings iron sources. Though.


Source: www.womenshealthmag.com

10/10/2020

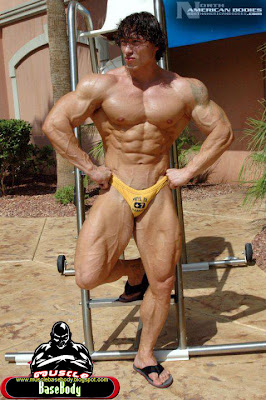
Denis Sergovskiy - bodybuilding model

 Denis Sergovskiy


Full Name: Denis Sergovskiy
Born: February 13, 1980
Hometown: Russia, Moscow
Moved to U.S. In 2005
Turn Pro: 2008
Pro Debut: 2009
Height: 6’ 1”
Weight: 220 lbs.
Hair: Dark Brown
Eyes: Blue
Facial Hair: Shaved
Build: Athletic
Skin Color: Tan
18”  neck
53”  chest
19”  biceps
32”  waist
7”  wrist
4%  body fat
11  shoe size
XL  short size
32/34 Pant Size
Biography:
 Denis came to U.S. For a role in a Russian dance troupe for Las Vegas show, loved the city and stayed. He competes at a bodyweight of around 225 lbs and stays lean all year round for his work as a fitness model, star in TV commercials and movies. He is a bodybuilder in great demand with the photographers due to his flawless symmetry and charismatic personality.
Denis Sergovskiy Posing at Beach
 Denis Sergovskiy hot body
 Denis Sergovskiy in swimming pool
 Denis Sergovskiy muscles
 Denis Sergovskiy bodybuilder
 Denis Sergovskiy double biceps
Denis Sergovskiy most muscular

06/10/2020

I Cured My Yeast Infection

 This Super Simple 5-Step Protocol Cured Candida Yeast Infections In Just 12 Hours

What is the Yeast Infection No More System?

Yeast Infection No More is a clinically proven 5 step multi-dimensional Candida overgrowth healing system that has been polished and perfected over 12 years of research trial and error.

It is a laser targeted combination of powerful series of protocols set in a unique order and timing aimed at eliminating Candida overgrowth, restoring your intestinal balance and thus helping you gain permanent freedom from all types of yeast infections in all levels of severity.

You see, Candida overgrowth is a serious condition that can lead to dangerous health complications if left untreated. When Candida albicans shifts from non-pathogenic to pathogenic form, it produces root-like structures called rhizoids, that penetrate the intestinal walls and create holes in the walls of the intestines.

This enables toxic waste, bacteria and undigested food to enter the blood stream causing many often dangerous conditions such as: leaky gut syndrome, severe rashes, brain fog, acid reflux, memory loss, joint pain and severe inflammation and yeast in the sinuses and lungs. This can have a negative effect on our brain and can significantly interfere with our biochemical processes.

author

That’s why Linda Allen, certified nutrition specialist (CNS), medical researcher, speaker and author from Irvine, California (USA) had put together the 5-step Yeast Infection No More system to share this important information. After suffering from systemic yeast infections for more than a decade and after 12 years of research, trial and error, Linda has helped over 143,958 women and men in 157 countries worldwide to discover the key to restoring intestinal balance, eliminating candida overgrowth and achieving permanent freedom from all types of yeast infections.


05/10/2020

Do You want to learn how to have a Pain Free Birth


Do You want to learn how to have a Pain Free Birth (yes, it is possible) and make your DREAM BIRTH Memorable Forever?

I will show you how you can use Holistic Therapies like Diet, Supplements, Herbs, Aromatherapy, Homeopathy, Crystal Therapy and Acupressure For Common Pregnancy Ailments and Birth and have A Wonderful, Memorable Pregnancy and Birth!

Dear Pregnant Mama,

I am Citrine, a Crunchy Mom, Aromatherapist, Herbalist and Author of Bump to Birth. This Book is written for Crunchy Mamas like you who question mainstream medicine, trust their body and instincts and take a Holistic route. I have mentioned different Holistic Methods that I used in both my Pregnancies that made my Pregnancies smooth and Joyful. I have also mentioned my Secrets that helped me deal with Labor pain,  shorten my Labor by 50% (Yes it was only 6 and a half hours compared to my 12 Hour Labor the first time) and have a Wonderful Unmedicated Home Waterbirth (that literally changed my life) with my second Baby. Even if you are not planning a Home Birth this e-book will help you throughout your Pregnancy and help you avoid Pitocin, Epidural, Episiotomy and other Interventions even in a Hospital Setting.

Childbirth is not a medical emergency and Women are much stronger than they think they are. So Mama, trust your Body, trust your Instincts and don’t let your fear hold you back. Just believe that YOU CAN DO IT!

I will tell you how you can treat your common Pregnancy Ailments using Nutrition, Herbs, Aromatherapy, Acupressure, how you can prepare your Body for Labor and how you can deal with Labor Pain and have a Wonderful Birth Experience.


Pregnancy is a wonderful time in any woman’s life. Its filled with Excitement, Happiness, Joy and Anticipation. But at the same time you may feel nervous, fearful and even sick because of the hormonal ups and downs. Your Body is going through a massive transformation and there’s no doubt that you may face some minor ailments during this phase.

Ailments like Morning Sickness, Constipation, Itchy Skin, UTI etc. can dampen your experience. If you are Crunchy and would like to avoid taking any conventional medication during Pregnancy and Childbirth then this e-book is for YOU!

I cover Common Pregnancy Ailments in this e-book so that you can deal with them using Holistic Remedies like Foods, Herbs, Supplements, Ayurveda, Homeopathy, Aromatherapy, Acupressure etc.


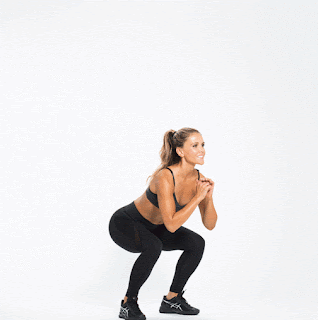
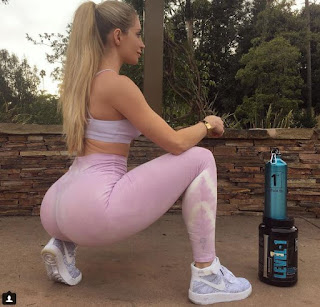
The best exercies for the ass at home, you will tghten it in just 5 minutes a day.

Perfomed by Bittany Peril Yobi - Instagram star who imperessed with his incredibe transformation on the saa. The exercises do not require.


All you need is your weight, which makets them especially suitable for taining at hom.

Do each exercise about 15 - 20 reps x 3 sets.

We start:

1. 

2. 
3. 
4. 
5. 
6. 
7. 
8. 
9. 

30/09/2020

6 moves to have a death circle like AMANDA LEE

 Amanda Lee is a beautiful 29-year-old coach that is known to many people with her round ass to death, she just started creating an account on Instagram 2 years ago but now has more than 1 , 5 million followers, watching her body every day.

Until she was nominated for a photo shoot by a friend for Playboy magazine and started to gain attention and become famous. Although Amanda Lee is not the only one with a beautiful body, many followers, there is also Jen Shelter with 7.5 million followers.

Not only beautiful, big butt, but Amanda also attracts others because of her beautiful appearance and round 1 and round 2 as a supermodel.

To have the body that everyone dreams of is entirely thanks to her non-stop practice. Accompanying it is the diet and addition of nutrients during the correct exercise has helped Amanda's butt muscles push more momentum. And until now, she still maintains a workout regimen 5 times / week to keep this figure. 


As a fitness coach, Amanda is not afraid to share: “I do not regularly do cardio to burn fat because it completely wastes my time, instead I often run and combine many movements, impact directly on round 3, maintain long term you will get the size you want.

Here, Pose would like to introduce 6 moves that Amanda usually does to tone and increase her bust size, the following moves are quite easy and you can also practice at home. Do each leg with each exercise 25 times and then repeat 2-3 times.


1/Squat and foot kick


Exercise posture:

- Stand with feet shoulder width apart, toes facing forward, hands in front of chest 

- Note that your back is straight and your buttocks are arched back

- Perform basic squat posture as usual and when standing up, you kick your feet up as shown above and continue to squat and kick your legs. Do the left and right leg 25 times.

If you are familiar, you can hold more weights to increase the weight of your body.

2 / Suspension bridge posture


Exercise posture:

- Prepare in a supine position, hands relaxed with the body, legs folded parallel to each other

- Squeeze your belly and raise your buttocks up, lower your hips down and raise, hit right then left in an arc

Do 25 reps and repeat 2-3 times.

3 / Click squat position


Exercise posture:

Prepare to be in a normal squat position, feet shoulder-width apart and feet forward, hands folded forward

- Do a squat and do gentle beats, you can lower your buttocks lower to increase weight to your body to make the muscles of the buttocks and thighs more stretch

Do this 25 times and repeat 2-3 rounds

4 / Leaning open-leg posture


Do the movements:

Lie on your side, use one hand to support the head, the other hand placed on your stomach to support the upper body

Legs retracted, tilted together with the body, toes touching, knees closed together

- Perform the foot-open movement as shown above, breathe evenly and pull in the stomach, perform 25 times on each leg.

5 / Holding feet upside down in the air


Exercise posture:

- Prepare your posture like the number 5 above

- At this time, instead of two feet horizontally on the ground, we raise our legs, pull in the stomach, breathe evenly and start to open the legs as shown in the picture 25 times for each leg.

6 / Back foot kick


Exercise posture:

- The hands are on equal footing, eyes looking straight

- Use 1 leg to stretch back and kick up, click up and down 3-4 times and then lower, continue with the other leg

- Do 25 reps for each leg

26/09/2020

The 15 Best Butt Exercises For Super-Toned Glute Muscles

 BY 

If you want to build a strong AF backside, you've gotta incorporate the best butt exercises into your workout routine.


Of course, not only does incorporating the right moves help you score a sculpted booty, but strengthening your glutes also helps protect your lower back, which can be put at risk during moves like squats and deadlifts if your peach isn't strong enough to handle the load. (This is especially true if you're lifting heavy weights.)

Plus, strong glutes can also make you a better runner—and even help you avoid knee injuries.

You don't need any more convincing, do you? Didn't think so.

Here, I rounded up 15 of the best butt exercises you can add in on your lower-body days or together as a DIY glutes workout. To get the most out of them, you must, must, must be on top of your form.

Throughout all of these moves, keep your ribcage in line with your pelvis. Basically, do ~NOT~ flare out your ribs and over-arch your lower back. Tuck your pelvis in towards your belly button and pull your ribs down as if you've just taken a big, relaxing exhale. From there, tighten your core and you're in the perfect position to really set your glutes on fire.

However you choose to put these butt exercises to work for you, they'll help you build a stronger backside in no time.

Time: 15 minutes

Equipment: stability ball (or elevated surface, like a couch), resistance band (long or looped), set of dumbbells or light kettlebells

Good for: Glutes, butt muscles

1. Walking Lunges


How to: Start standing with feet together holding a pair of weights at shoulder height, elbows bent in front of body. Step right foot forward and bend both knees into a lunge, stopping when both legs form 90-degree angles. Press through right heel to stand and step left foot forward, lowering into a lunge. That's one rep. Perform 15 reps, then immediately continue on to your next exercise. (You're doing at least three.) Once you've finished all of your movements, rest for up to one minute. Then, repeat three more times for four total rounds.

2. Stability Ball Hip Thrust


How to: Start with arms behind head (elbows wide), upper back pressed into stability ball (or elevated surface, like a couch), legs bent, feet flat on floor, and hips hovering above mat. Lean back into stability ball and lift hips toward ceiling until thighs are parallel to mat. Return to start. That's one rep. Perform 15 reps, then immediately continue on to your next exercise. (You're doing at least three.) Once you've finished all of your movements, rest for up to one minute. Then, repeat three more times for four total rounds.

3. Single-Leg Deadlift


How to: Start standing with legs together, weight on right leg, right arm on hip, and left arm pointed straight down toward floor. Engage abs and slowly lean forward, extending left leg straight back behind body and lowering torso toward floor until both are parallel to ground and left hand is almost touching floor. Drive into right heel to return to start position. That’s one rep. Perform 15 reps on each side, then immediately continue on to your next exercise. (You're doing at least three.) Once you've finished all of your movements, rest for up to one minute. Then, repeat three more times for four total rounds.

4. Supported Single-Leg Deadlift


How to: Start standing on left leg with a weight in right hand, palm facing toward thighs. left arm by side and right leg straight and a few feet behind body with heel high. Keep left leg slightly bent. Lean forward, hinging at the hips with a flat back while lowering the weight toward the floor. Drive into left heel to return to the standing position. That’s one rep. Perform 15 reps on each side, then immediately continue on to your next exercise. (You're doing at least three.) Once you've finished all of your movements, rest for up to one minute. Then, repeat three more times for four total rounds.

5. Step Up

How to: Start standing facing a bench or stair, hands on waist and feet under hips. Step right foot onto bench or stair and pull left knee up toward chest. Reverse movement to return to start. That's one rep. Perform 15 reps on each side, then immediately continue on to your next exercise. (You're doing at least three.) Once you've finished all of your movements, rest for up to one minute. Then, repeat three more times for four total rounds.

6. Banded Lateral Step-Out Squat

How to: Start standing with a resistance band wrapped around shins, feet under hips, with hands clasped in front of chest. Take a big step to the right, then bend knees, sit back, and lower until thighs are parallel with the floor. Engage glutes and press back up through heels to starting position. Repeat on the other side. That's one rep. Perform 15 reps, then immediately continue on to your next exercise. (You're doing at least three.) Once you've finished all of your movements, rest for up to one minute. Then, repeat three more times for four total rounds.

7. Banded Glute Bridge

How to: Wrap a resistance band around thighs then lie down with knees bent, feet flat on the floor, and arms by sides on mat. Engage core, then press into heels and squeeze glutes to raise your hips toward the ceiling—maintain tension on the band the whole time. Hold the position for a second before lowering to start. That's one rep. Perform 15 reps, then immediately continue on to your next exercise. (You're doing at least three.) Once you've finished all of your movements, rest for up to one minute. Then, repeat three more times for four total rounds.

8. Isometric Glute Bridge
How to: Start lying on back with knees bent and feet flat on the floor, arms by sides on mat. Engage core, then press into heels and squeeze glutes to lift hips toward the ceiling. Maintain space between chin and chest and keep upper back on the ground. Hold for up to 30 seconds. That's one rep. Perform up to 15 reps, then immediately continue on to your next exercise. (You're doing at least three.) Once you've finished all of your movements, rest for up to one minute. Then, repeat three more times for four total rounds.

9. Glute Bridge March


How to: Start lying on back with knees bent and feet flat on the floor, hip-width apart. Engage core, then press into heels and squeeze glutes to raise hips until body forms a straight line from knees to shoulders. Lift right knee toward chest. Pause, then lower right foot. Repeat with the other leg. That's one rep. Perform 15 reps, then immediately continue on to your next exercise. (You're doing at least three.) Once you've finished all of your movements, rest for up to one minute. Then, repeat three more times for four total rounds.

10. Stability Ball Bridge
How to: Start lying on back with arms by sides, legs bent to 90-degree angles (shins parallel to mat), and feet on stability ball (or elevated surface, like a couch). Push down into feet, upper back, and arms to lift hips off ground a few inches. Return to start. That's one rep. Perform 15 reps, then immediately continue on to your next exercise. (You're doing at least three.) Once you've finished all of your movements, rest for up to one minute. Then, repeat three more times for four total rounds.

11. Weighted Goodmorning

How to: Stand with feet shoulder-width apart. Hold two weights in hands, bend arms, and place them behind shoulders onto back. This is your start position. Keeping knees slightly bent and torso straight, slowly hinge forward from hips until upper body is parallel to the floor. Hold for a moment, then return to start. That's one rep. Perform 15 reps, then immediately continue on to your next exercise. (You're doing at least three.) Once you've finished all of your movements, rest for up to one minute. Then, repeat three more times for four total rounds.

12. Isometric Squat
How to: Start standing with feet shoulder-width apart and hands by sides. Push hips back and bend knees until thighs are nearly parallel to the ground bringing hands to clasp in front of chest. Hold for up to 30 seconds. That's one rep. Perform up to 15 reps, then immediately continue on to your next exercise. (You're doing at least three.) Once you've finished all of your movements, rest for up to one minute. Then, repeat three more times for four total rounds.

13. Dumbbell Donkey Kick
How to: Start on all fours with a dumbbell tucked in the crease of right leg. Keep that leg bent at a 90-degree angle and foot flexed, then press up through foot to kick leg straight up until knee is in line with hip and parallel to floor. Reverse the movement to return to start. That's one rep. Perform 15 reps on each side, then immediately continue on to your next exercise. (You're doing at least three.) Once you've finished all of your movements, rest for up to one minute. Then, repeat three more times for four total rounds.

14. Banded Leg Lift


How to: Get on hands and knees with a resistance band wrapped around thighs. Keeping foot flexed and leg straight, raise left leg into the air until in-line with hips and parallel to floor. This is your starting position. Engage glutes to lift leg up a couple more inches, then lower back to hip height. That's one rep. Perform 15 reps on each side, then immediately continue on to your next exercise. (You're doing at least three.) Once you've finished all of your movements, rest for up to one minute. Then, repeat three more times for four total rounds.

15. Isometric Lunge


How to: Stand up tall, then take a large step forward with your right foot, coming on to the ball of your left. Arms are by sides. This is your starting position From here, bend knees and lower body until knees are bent to 90-degree angles while bringing hands to clasp in front of chest. Hold for up to 30 seconds. That's one rep. Perform up to 15 reps on each side (just make sure you're even), then immediately continue on to your next exercise. (You're doing at least three.) Once you've finished all of your movements, rest for up to one minute. Then, repeat three more times for four total rounds.

24/09/2020

Irregular Periods


The Natural Menopause Solution by Julissa Clay

The Simple, Straightforward Guide That Helps Men And Women With Peri-Menopause, Menopause, And Andropause Get Fast And Permanent Relief


Here’s a sneak preview of the incredible information you’ll find in my breakthrough guide:

  • The 3 different phases of menopause…and knowing which one you are in makes all the difference! Pg. 6
  • Which symptoms mean that you are in menopause…and which can fool you! Pg. 8
  • The 8 signs that tell you whether you really have transitioned to menopause or not…you NEED to know this! Pg. 11
  • How your brain can be the best test for menopause…and the little-know trick for deciphering your “mood code” Pg. 13
  • Having trouble sleeping lately? That could be a sign of ____ Pg. 17

Even more amazing secrets found ONLY in the Natural Menopause Solution:

  • The two-pronged attack that every woman needs in the war against menopause symptoms. Pg. 18
  • The horrifying dangers of HRT that your doctor WON’T tell you. Pg. 21
  • The $6 billion dollar industry that wants to keep you on medications for life…and how to avoid becoming its next victim! Pg. 21
  • The 5 amazing “superfoods” that KO menopause symptoms in a flash! Pg. 23
  • This common so-called “healthy food” that actually makes your hormones worse! Pg. 24
  • The right (and wrong) way to eat soy to make hot flashes history! Pg. 24

    Here’s What Happens When You Try My Program

    You’re Symptoms Will Much More Manageable: Maybe it won’t happen overnight (and anything that does promise that is flat-out lying to you). But if you stick to the advice in my guide I guarantee that you’ll feel like menopause is a thing of the past for you!

    You’ll Be Healthier: There’s no point in reducing your symptoms if it puts your health in jeopardy. Unlike dangerous HRT, my program actually makes you MORE healthy as you feel FEWER symptoms!

    You’ll Feel Better: Forget hot flashes, night sweats and energy zaps. You’ll have a spring in your step and a new lease on life after you try my program for yourself.

    You’ll Save Money: Hormones, drugs, doctor’s visits and useless supplements add up fast! I don’t know about you, but I can’t afford to spend money on things that don’t work. Luckily, my guide lets you ditch the expensive stuff for dirt-cheap solutions that work even better!

    I’ve jam-packed so many secrets in my guide I just have to share them:

    • The delicious food that most women aren’t getting nearly enough of…and how it can put the brakes on hot flashes! Pg. 25
    • The 6 “danger foods” that make your menopause symptoms 10x worse (including a real shocker) Pg. 26
    • The weird weapon that works wonders on menopause symptoms and is free for anyone to try. Pg. 28
    • How to tap into the power of exercise to make your symptoms plummet like the 2007 Dow Jones! Pg. 30
    • Save your money! Use these supplements that actually work and watch menopause symptoms disappear! Pg. 35
    • My detailed hour-by-hour plan that holds your hand down the road to menopause relief! Pg. 41
    • A complete, 21-day action plan to stop menopausal symptoms for good!
    • The little-known “man-o-pause” or male menopause…and how to treat it the natural way

    Here’s What I’m Offering